Application Internationalization (i18n)
Internationlization (or i18n) allows you to localize your application in all available languages supported by our robots.
This tutorial will guide you through the localization process. For the sake of simplicity we will only localize our application in two languages. The process is the same if you have multiple languages to support.
Step 1: Create A localized parameter
The first step to localize an application is to mark the content to localize.
| Step | Description |
|---|---|
| 1 . | Create a python Box: Drag and drop the Programming > Templates > Python script box onto the Flow Diagram panel. |
Add a localized parameter: Right click the box and select Edit Box in the contextual menu, or through the inspector hit the button ‘+’ next to Parameters. Select Localized string as type for the parameter. Let’s give the name ‘Localize me’ to our parameter. Note: you can give any name you want, but don’t forget each time you will change this name you will need to fix your code AND your translations. |
|
Modify onStopped Outputs. Modify the onStopped Outputs of your Python Script box to type String. |
|
Get your localized parameter. You get the translation of your localized parameter the same way your are use to get your parameter. In the onInput_onStart() function of your Python box put the following code: translated = self.getParameter("Localized me")
self.onStopped(translated)
First we get the current value of our parameter, as we always used to do. The correct translation is automatically returned according to the current language of your robot. Then we send the translated parameter text to the onStopped() output, because we have great things to do with it! |
|
Add a Say Text Box. Now we have retrieved our translated text, we are going to ask the robot to say it for us. Drag and drop the Speech > Creation > Say Text box onto the Flow Diagram panel. |
|
Make the connections. Connect the output of the Python Script Box to the input of the Say Text box. Don’t Forget to connect the onStart of your root diagram to the Python Script Box You should end with something like this: 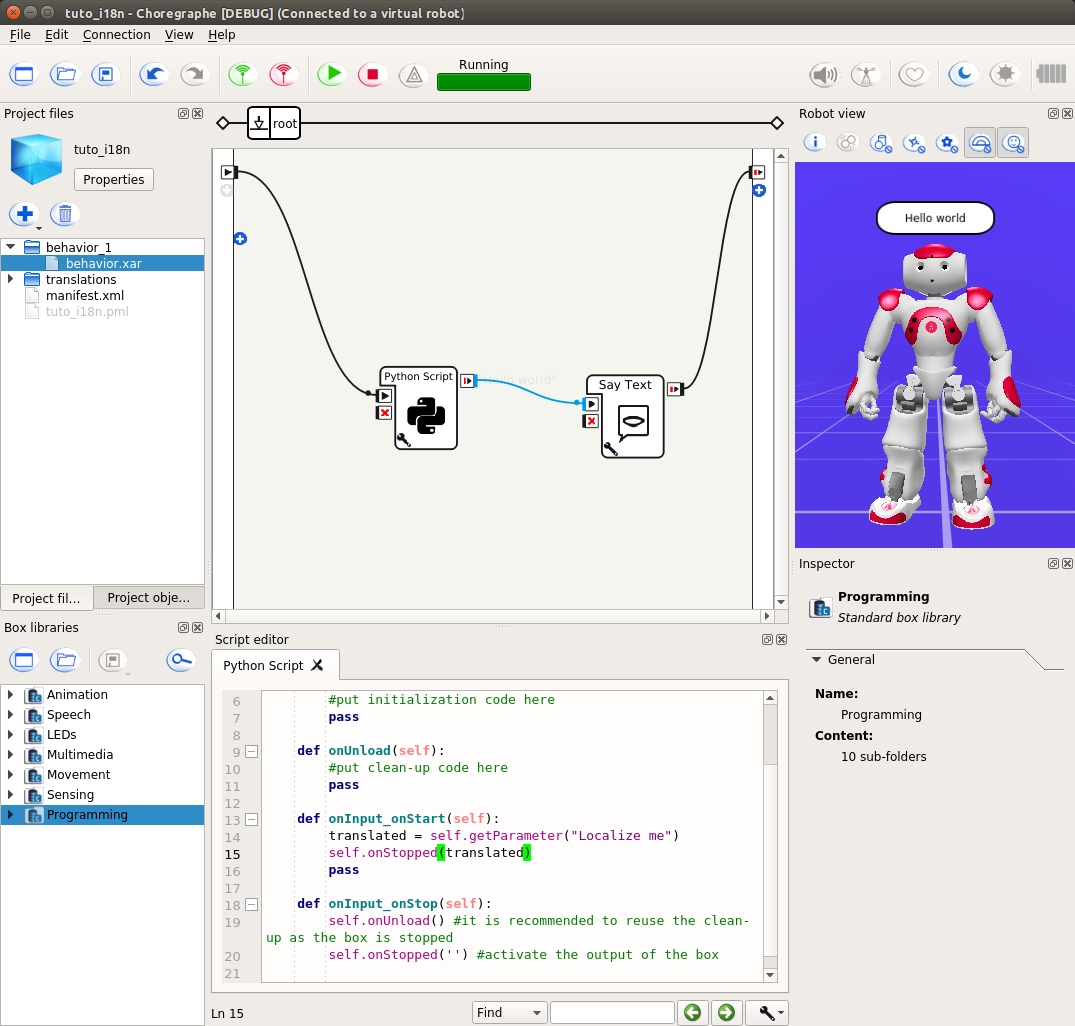
|
|
Hit Play! Click the |
 Play button to test your application.
The robot should say Hello world.
Here we have an app, that is i18n capable. Let’s localized it!
Play button to test your application.
The robot should say Hello world.
Here we have an app, that is i18n capable. Let’s localized it!Step 2: Localize you application
| Step | Description |
|---|---|
Add a Supported Language. Open the project properties and a supported language, here we add French. 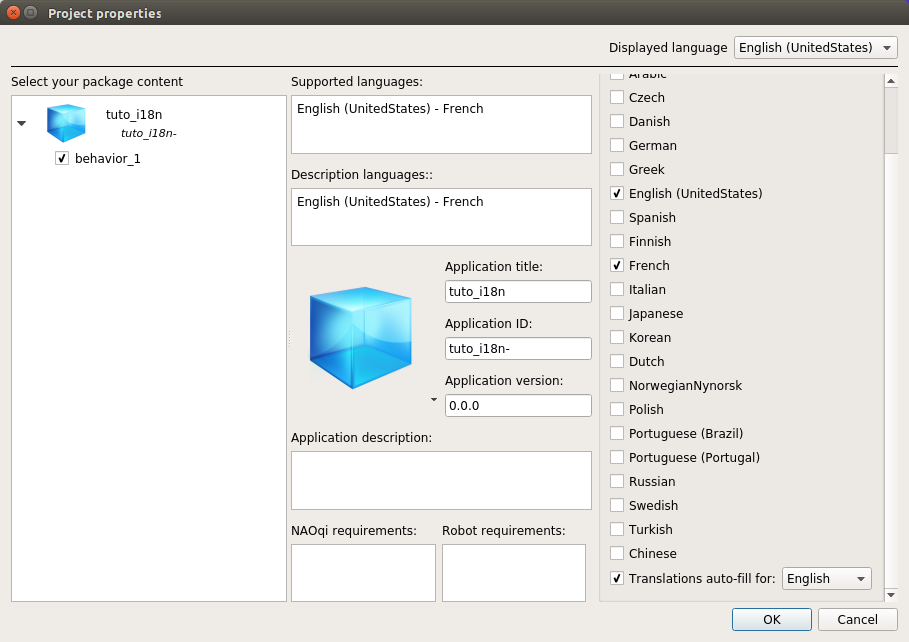
|
|
Save your project. Since localization text gathering need actual files to work, you have to save your project to allow process to work. |
|
Open your translation files (.ts). To open each translation file individually, double click them in the Project Files. To open all the translation files, choose File > Localize Application. |
|
Using Qt linguist. Translation files are updated each time you open want to open them (just before). You can manually launch the gathering process by clicking on File > Update Translations. As you can see the English translation have been ‘auto-filled’ by its source text, see for more explanation. You still have to validated it the first time it is filled. In the French translation we put the text ‘Bonjour monde’ and validate it. You can find a the complete documentation of Qt linguist here. When you a are done, save the file(s), and exit Qt linguist. |
|
Change current language of your robot. In a ‘real life’ use case, you don’t need to do that, but for the sake of this tutorial, we will add a ‘set Language’ box to change the language of your robot. If you have a real robot you can skip this, and use the Robot settings to do it. Drag and drop the Speech > Speech Settings > Set Language box onto the Flow Diagram panel. Now, replace the connection to the Python Script Box by connecting the onStart of our behavior to the Set Language box, and its onReady output to the onStart of the Python Scrip box. Set the language to French (or one the supported language you chose to localize your application) by clicking on the wrench and select French in the drop down menu or through the inspector. 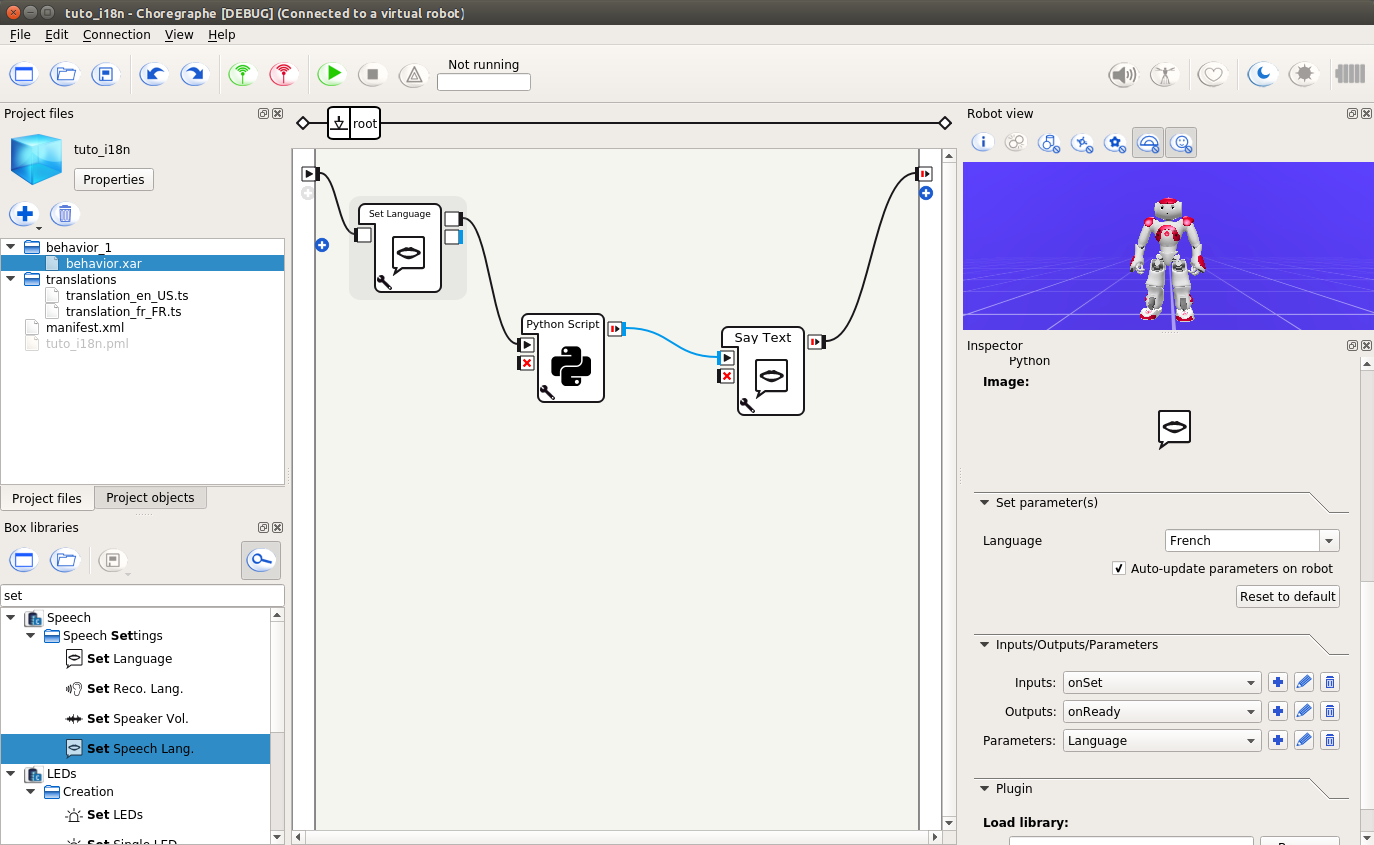
|
|
Hit Play! Hit |