NAOFlasher for NAO V3.x
Before starting
Make sure your NAO is a V3.x, if it is not the case, see NAOFlasher for NAO V4.
Be aware that the rescue procedure is not the standard way to update the software version of NAO.
To make sure it is what you need, read: Rescue mode.
How to update your NAO V3.x with NAOFlasher
| Step | Action |
|---|---|
Get the NAO system image. You can download the latest release from the Aldebaran Community Website. Make sure to select the image that suits to your NAO:
|
|
| Make sure that the robot is plugged to its charger all along the system update process. | |
| Shutdown the robot. | |
Remove the USB stick from the robot’s head. It is a small (red or white) flat stick located on the right if you are looking at NAO’s eyes. Note The USB stick is located near the radiator, be careful when removing it! Warning Do not confuse the USB stick with the WiFi dongle which holds electronic components. |
|
Write the image on the USB stick. For further details, see Writing the image on the USB stick. |
|
Upgrade the NAO’s system and run the new software version For further details, see Running the new software version. |
Writing the image on the USB stick
| Step | Action |
|---|---|
Insert your USB stick in your computer. Note On Windows and Mac OS X, you might encounter a prompt telling you that the USB drive you inserted is not readable, and that you should format it. Please ignore this and click the Cancel button or similar. |
|
Launch the flasher executable. It should look roughly like this: 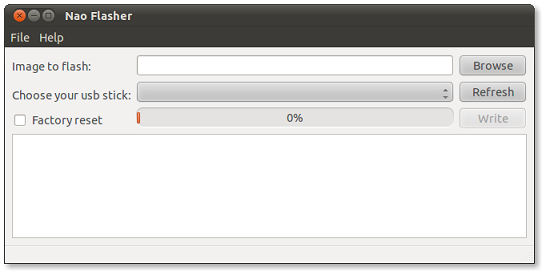
|
|
Click the Browse button (or press Ctrl+O) to select the image you want to flash in your local file system. You can also copy/paste the file’s address directly in the text box. 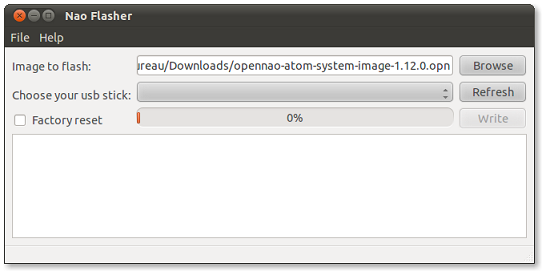
|
|
Select your USB stick from the list. If your USB stick doesn’t appear in the list, try the Refresh button after inserting it in your computer). 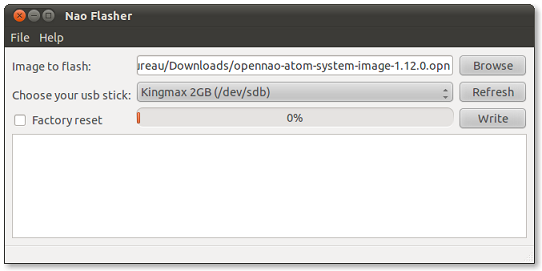
|
|
Check the Factory Reset box in order to install a brand new system in a Rescue mode. If not checked, NAO Flasher will do a simple update, like the command available in Choregraphe. For further details about why you should or should not choose a Factory reset, read Rescue mode. Warning Factory Reset will remove all the data from your robot, please backup your data before running the program. 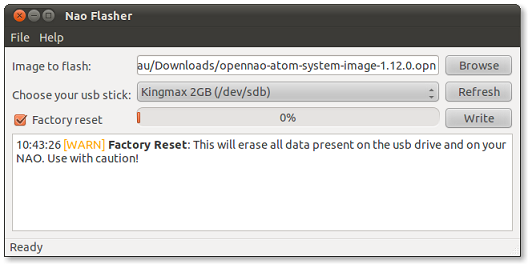
|
|
Click the Write button to start the process: 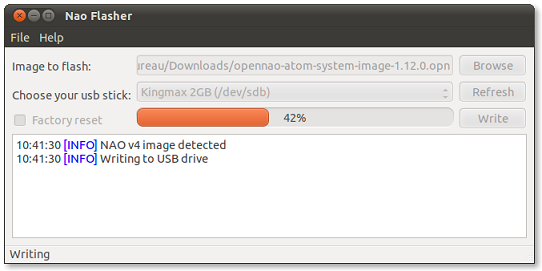
|
|
If you get an error message telling:
|
|
When the process is completed, it should look like this: 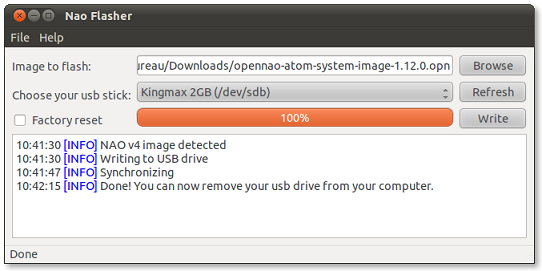
|
Running the new software version
| Step | Action |
|---|---|
Plug the USB stick you previously flashed into the USB connector at the back of NAO’s head. Warning Insert the USB stick with its golden connectors oriented toward the top. |
|
| To perform and monitor the upgrade, see: Launching the upgrade. |