Setting NAO’s WiFi connection
Why setting a WiFi connection
You can connect NAO to your computer using a wired or WiFi connection:
- Wired connection is mandatory for the initial settings.
- WiFi connection is highly recommended as soon as NAO starts moving.
Warning
Make sure NAO is not connected with an Ethernet cable while executing movements which could pull the wire and damage the port.
How to set NAO’s WiFi connection
| Step | Action |
|---|---|
| Turn on your NAO. | |
Remove the hatch behind his head to access to the Ethernet socket and plug the Ethernet cable. 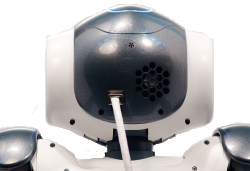
|
|
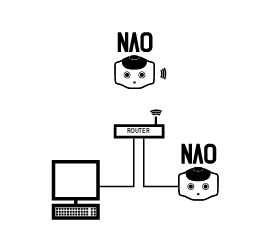
If you have a router with a spare Ethernet port:
If not:
|
|
Access the NAO Web page and log-in. For further details, see: How to access the NAO Web page. |
|
In the Network page, choose and configure a WiFi network. For further details, see: WiFi standard configuration. |
|
| You can now disconnect the Ethernet cable and close the hatch behind NAO‘s head. |
 or
or 
Test your connection
| Step | Action |
|---|---|
On your computer, access to the Web page of your robot. For further details, see How to access the NAO Web page. 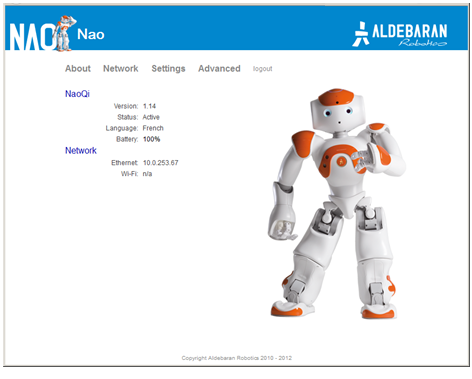
|
|
Click NAO’s picture to make appear the speech bubble. 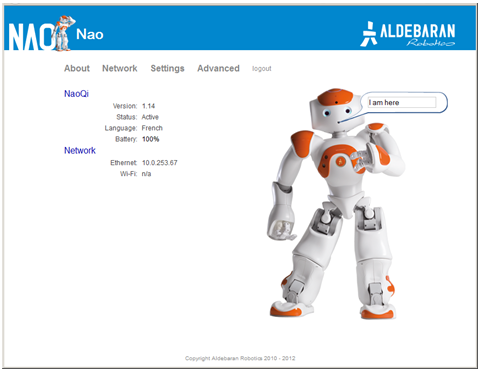
|
|
| Type Hello world in the speech bubble. | |
| Press Enter key. |
Result
Your robot says “Hello world”.