Using urbi-lab with nao
urbi-lab enables you to create, save, and reuse custom GUI interfaces with
- easy access and visualisation to robot sensors and actuators
- binding of code snipets (NAOqi calls) to buttons.
Getting the necessary components
Get the lattest urbi-suite package for your OS.
Uncompress the archive anywhere (in a directory we will call ROOTDIR below).
Running the components
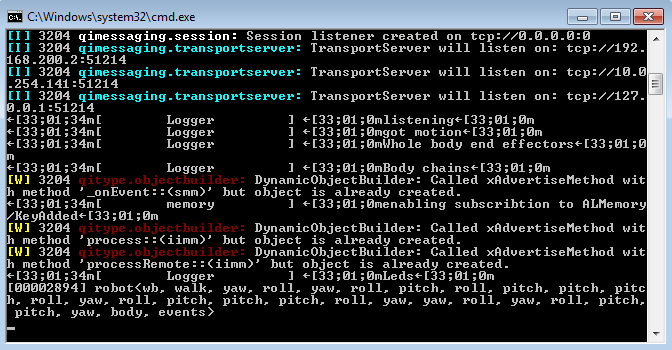
If you do not have the urbi application installed on your robot, you first need to start an urbi instance and connect it to your robot:
ROOTDIR/bin/urbi4nao.bat MYNAO
replace urbi4nao.bat by urbi4nao.sh for linux and macOS, and MYNAO by the name or IP address of your robot. Since the command takes an argument you need to type it from a command line shell, but you can alternatively:
- create a shortcut under Windows, and put the argument in its properties.
- simply edit the script, and replace the final %1 by the name/IP of your robot. You can then double-click the resulting script.
It will spawn a console window:
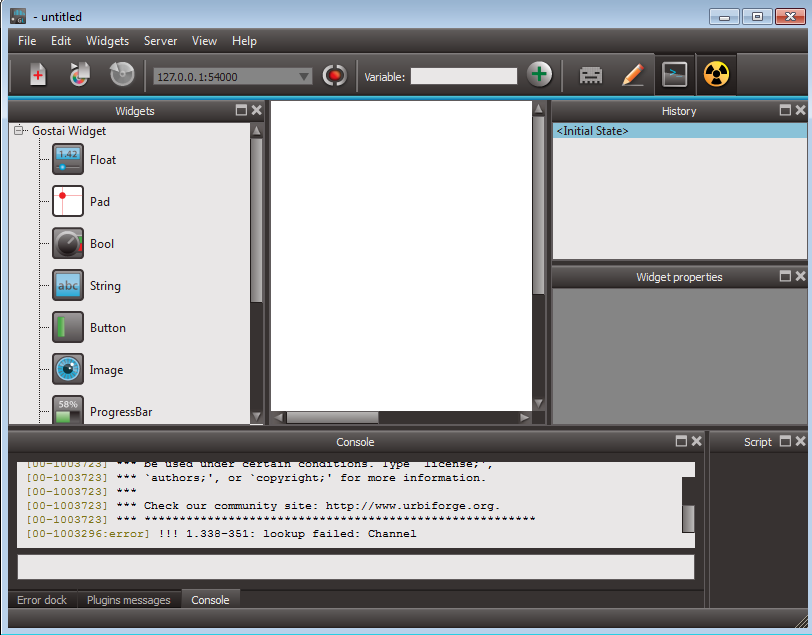
You can then start urbi-lab by running GostaiLab.exe. Select new layout on the popup, and click the green round button in the top bar, at the right of the robot address (which should read 127.0.0.1:54000).
You should then see the following interface:
Getting started with urbi-lab
Urbi-lab can display robot sensors and move robot actuators by name. You can obtain the list of available devices by typing in the console:
robot.body.flatDump();
This should produce an output similar to that:
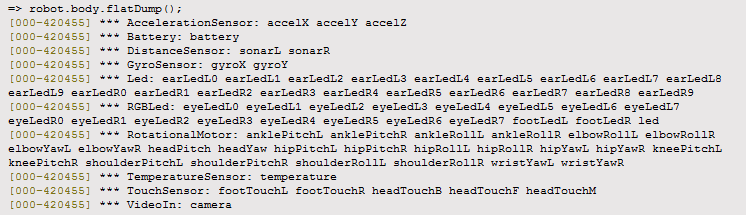
This is the list of available sensors/actuators, sorted by name.
Sensor
Let’s start with a simple sensor: type “footTouchL.val” in the Variable text area in the top bar, and hit return. lab auto-detects the sensor type, and displays the following widget:
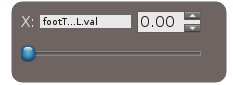
Touch the left foot sensor, and you will see tha value go from 0 to 1.
Actuator
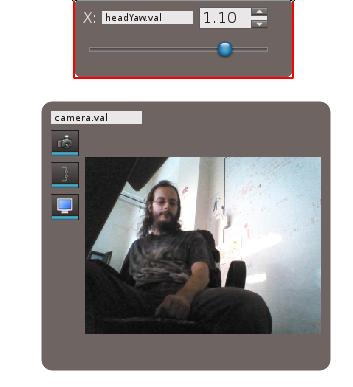
Now, try with headYaw.val. This should create a new similar widget, with the current head yaw sensor value. If you turn the head by hand, you should see the value update.
Since headYaw.val is also an actuator, you can move the slider, and you will see the head move (if stiffness is off, just type headYaw.stiffness = 1; (do not forget the semicolon!) in the console input at the bottom of the window).
Image
For performance reasons camera in urbiscript is off by default. You must first enable it by typing camera.load = 1;. Then type camera.val in the Variable input, and you will get a resizeable widget with the video stream!
Buttons
You can associate pieces of code (such as simple NAOqi calls) to buttons. For this, drag and drop a button from the left widget bar into the main area.
When the button is selected, you should see a new script widget, by default at the right of the console widget (but all those widgets are dockable so you can rearrange the layout however you want).
Type the following:
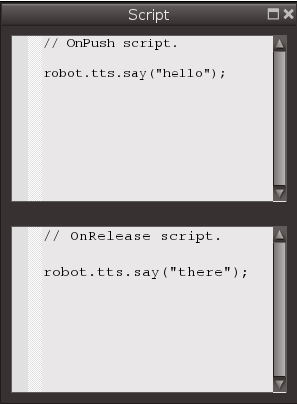
and test it by pressing and releasing the button.
Have a look at the urbi 4 nao documentation for a more extensive list of what you can do with urbiscript code.
Saving your layout
If you made a nice layout that you want to reuse in the future, you can save it, and load it later using the save/load buttons. The layout is saved under a single file with ula extension.
Play mode
When you’ve done setting your layout up and just want to use it, click on the play mode (the one that looks like an invader) button. This will lock the layout up, and allow you to use it without accidently moving widgets around.